Assignments > HW6: Create a Photo Carousel
Due on Mon, 11/13 @ 11:59PM. 20 Points.
Collaboration Policy
For this homework assignment, you are welcome to work in pairs (optional). Even if you collaborate with someone else, you must still submit your own files on GitHub. If you collaborate, you’ll just list your partner in the comments section of Moodle.
In this assignment, you will be building a photo carousel from scratch. While there are a million carousel widgets out there, the goal of this assignment is not to simply “build a carousel” but understanding how to use HTML, CSS, and JavaScript together to build any interactive interface that you want.
1. Set Up
Download the hw06 starter files and save them to your csci185/homework folder. Then, open the entire hw06 folder in VS Code.
Before you begin, you should first get familiar with the starter files:
index.html
Note that there are links to styles.css and carousel.js in the <head></head> tag. Note that there is also a carousel “skeleton” inside of the <body></body> tag:
<section class="carousel" aria-label="Photo Carousel">
<div class="current-photo">
<!-- Replace image here -->
<img src="images/img1-600x400.jpg" alt="current photo" />
</div>
<button class="back" onclick="back()" aria-label="Show previous slide">
<img src="images/left.png" alt="" />
</button>
<button class="forward" onclick="forward()" aria-label="Show next slide">
<img src="images/right.png" alt="" />
</button>
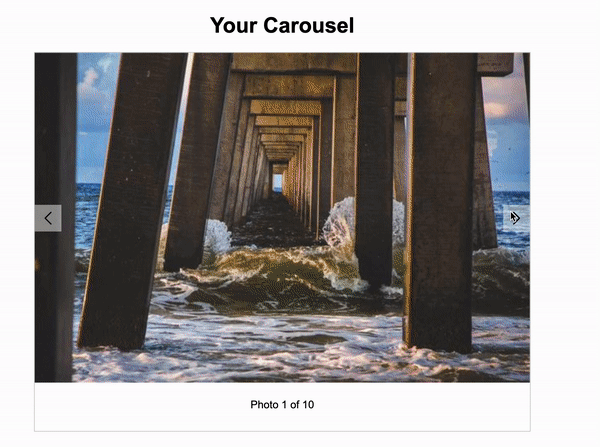
<p class="caption">Image 1 of 10</p>
</section>
The skeleton consists of:
- A carousel container (the section tag)
- A div tag for holding the image (which will be swapped out when the user clicks the previous and next buttons)
- Two buttons (to allow the user to control which photo should be displayed), and
- A caption (the p tag)
carousel.js
Inside of carousel, there is already some starter code written for you:
const photos = [
    "images/img1-600x400.jpg",
    "images/img2-600x400.jpg",
    "images/img3-600x400.jpg",
    "images/img4-600x400.jpg",
    "images/img5-600x400.jpg",
    "images/img6-600x400.jpg",
    "images/img7-600x400.jpg",
    "images/img8-600x400.jpg",
    "images/img9-600x400.jpg",
    "images/img10-600x400.jpg"
];
let idx = 0;

function showImage() {
    console.log('Show image');
}

function forward() {
    console.log('forward');
}

function back() {
    console.log('back');
}
Specifically:
- A variable called
photos, which stores an array of photo URLs (strings) - A variable called
idxwhich stores the position of the current photo being displayed - An unimplemented function called
showImage() - An unimplemented function definition called
forward() - An unimplemented function definition called
back()
styles.css
This file styles the carousel (you shouldn’t have to worry about any CSS edits for this homework assignment). Take a look if you’re interested in seeing how the styling works.
2. Your Tasks
After inspecting the starter code, please implement the carousel (below) by completing the following tasks:
1. Attach the event handlers to the buttons (3pts)
Inside index.html, attach the forward() and back() functions to the click events of the appropriate buttons (like we’ve been doing for the past few weeks).
2. Implement the showImage() function (7pts)
Inside carousel.js, implement the showImage() function. The job of this function is to:
- Replace the image that is currently displayed in the DOM with the image that is stored at the
idxposition inside thephotosarray. - Update the caption to indicate to the user which photo is being displayed (see animation below). For instance, if the fourth image in the array is being displayed, the caption should say: “4 of 10”
3. Implement the forward() function (5pts)
Inside carousel.js, implement the forward() function. The job of this function is to:
- Advance the carousel forward by incrementing the value stored inside of the
idxvariable, and - Invoke the
showImage()function so that the next photo is displayed.
Note that if the value held in idx is equal to the last available slots in the array, you should set idx to zero so that the carousel “wraps around” to the beginning.
4. Implement the back() function (5pts)
Inside carousel.js, implement the back() function. The job of this function is to:
- Advance the carousel backward by decrementing the value stored inside of the
idxvariable, and - Invoking the
showImage()function so that the previous photo is displayed.
Note that if the value held in idx is 0, set idx to the last available slot in the arrayso that the carousel “wraps around” to the end.
Tips
For the
forward()andback()functions, you will need to use an if / else statement to check if the idx value is out of bounds in either direction, so that you can respond accordingly.
3. What to Submit
Please double-check the instructions to make sure you implemented all of the features and that your carousel looks like the one in the animation above. Then, please navigate to the Moodle and submit the following:
- A link to your homepage on GitHub pages, which should link to your
hw06assignment (and previous tutorials and classwork you have done). - A link to your GitHub code repository (where your code files are stored).
- If you worked with a partner, list them in the comments section.