Assignments > Tutorial 7: Function practice
Due on Fri, 09/30 @ 11:59PM. 4 Points.
LEARNING OBJECTIVES:
- Practice working with third-party JavaScript libraries, and reading technical documentation.
- Practice writing your own functions.
In this assignment, you are going to use a third-party JavaScript library called p5.js. p5.js to create 4 different drawing functions. p5.js provides support for creating simple animations and drawings using JavaScript. Please download the starter files (above) and complete the tasks below:
1. Background Information
Coordinate system
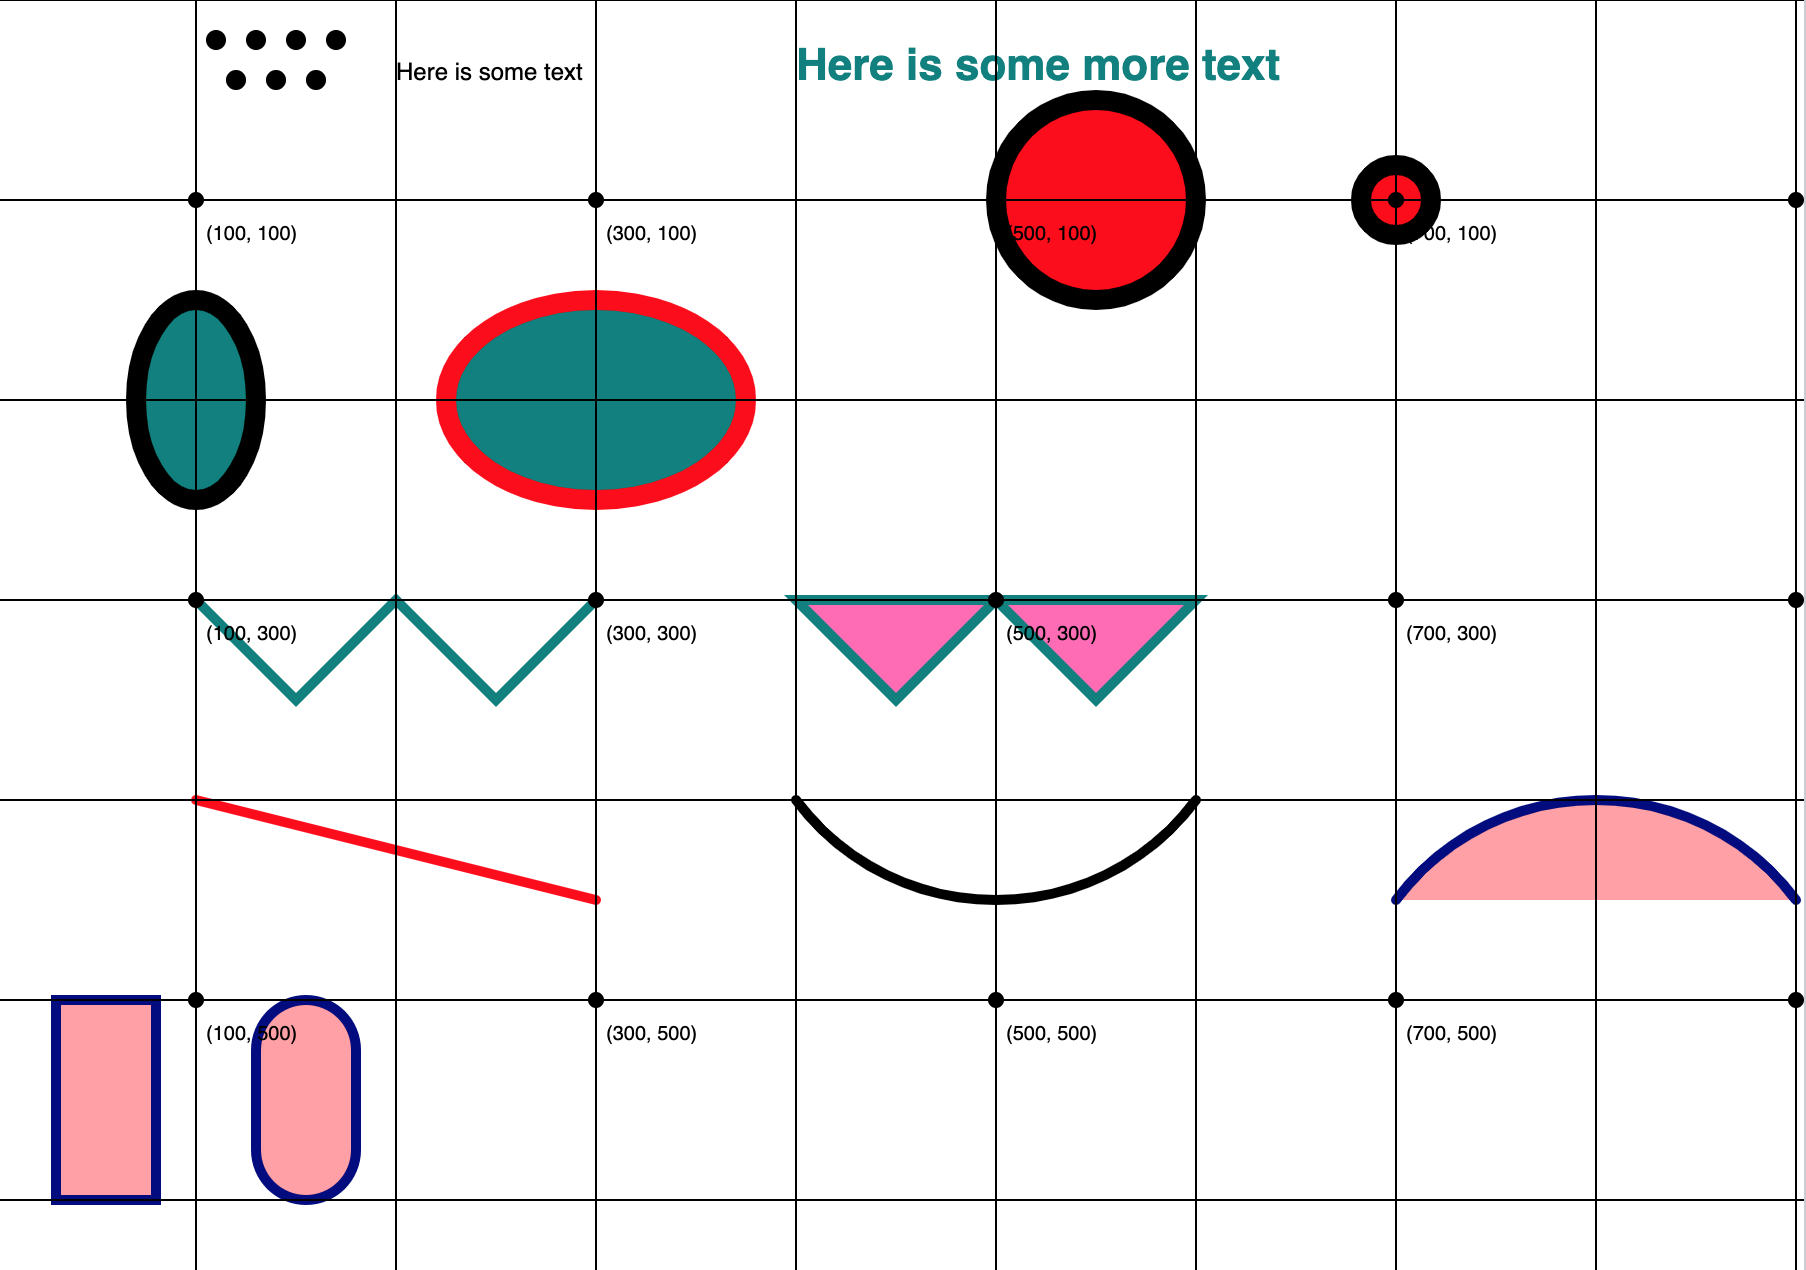
To draw your shapes, you will be using an (x, y) coordinate space that has a different origin from the one you use in math class. For computer graphics, the origin is typically in the top left-hand corner (pictured below). To help you debug, I have created a function, make_grid, in the helpers.py file, that will draw gridlines for you.

Source: https://processing.org/tutorials/coordinatesystemandshapes
p5.js sample code
To get you started, I have created a file of samples, located in the samples folder, that you can use as a reference as you learn how to draw shapes using p5.js. Please feel free to copy and adapt code from this file to complete your assignment. When you open samples/index.html in your web browser, you should see a screen that looks like this:
sketch.js (file you will be editing)
In this assignment, you will be editing the sketch.js file. Inside of it, you will see a function called setup(). In p5.js, the setup() function is a special function that runs when the page loads.
- You will put all of your function calls inside of the body of the
setup()function definition. - You will put all of your function definitions below the
setup()function definition (each of these functions is partially implemented).
function setup() {
    const canvasWidth = window.innerWidth;
    const canvasHeight = window.innerHeight;
    createCanvas(canvasWidth, canvasHeight);

    // Exercise 1:
    drawCircle();   // add arguments to this function. Then add 3 new function calls w/different arguments.

    // Exercise 2:
    drawOval();     // add arguments to this function. Then add 3 new function calls w/different arguments.

    // Exercise 3:
    drawBullseye(); // add arguments to this function. Then add 3 new function calls w/different arguments.

    // Exercise 4:
    drawFace();     // add arguments to this function. Then add 3 new function calls w/different arguments.


    // built-in helper function (defined in utilities.js) that draws a grid.
    drawGrid(canvasWidth, canvasHeight);
}


// modify this function so that it accepts and honors
// the following parameters: centerX, centerY, size, and fillColor
function drawCircle() {
    fill('hotpink');
    circle(100, 100, 100);
}

// modify this function so that it accepts and honors
// the following parameters: centerX, centerY, sizeX, sizeY, and fillColor
function drawOval() {
    fill('teal');
    ellipse(100, 200, 100, 62.5);
}


// modify this function so that it accepts and honors
// the following 3 parameters: centerX, centerY, and size
function drawBullseye() {
    fill('teal');
    circle(100, 300, 100);
    fill('navy');
    circle(100, 300, 75);
    fill('teal');
    circle(100, 300, 50);
    fill('navy');
    circle(100, 300, 25);
}

// modify this function so that it accepts and honors
// the following 3 parameters: centerX, centerY, and size
function drawFace() {
    fill('white');
    circle(100, 400, 50);
    fill('black');
    circle(92, 392, 8);
    circle(108, 392, 8);
}
Documentation
Finally, you will definitely need to refer to the p5.js documentation. Most technical documentation is terse and difficult for beginners to interpret. That said, learning to read technical documentation is an important part of becoming a solid programmer, and will serve you well. You are essentially learning to read in a new genre, so interpreting the documentation takes practice (and patience). Ultimately, learning about p5.js is not important. However, learning how to work with third-party libraries is one of the most important things you will learn in the class.
2. Your Tasks
Take a look at some of the canvas functions and feel free to tinker with the arguments and values of the code. When you’re done, please complete the following 4 tasks:
1. Modify the drawCircle function
The job of the drawCircle function is to draw a circle to the canvas, centered at a given center point, according to a given radius (as specified by the arguments). Your drawCircle function must accept the following arguments (currently, it accepts no arguments):
- centerX (number): the x-position of the circle.
- centerY (number): the y-position of the circle.
- size (int): the diameter of the circle (not the the radius is half of the diameter).
- fillColor (string): the color that you want to draw the circle.
Your job: Currently, the drawCircle function draws a hard-coded circle that is always the drawn at the same position with the same color and size. By using parameters, you will make your function more flexible so that it can draw a circle anywhere, with any size / color.
2. Modify the drawOval function
The job of the drawOval function is to draw an oval to the canvas, centered at a given center point, according to a given x- and y-radius (as specified by the arguments). Your drawOval function must accept the following arguments (currently, it accepts no arguments):
- centerX (number): the x-position of the oval.
- centerY (number): the y-position of the oval.
- sizeX (int): the width of the oval.
- sizeY (int): the height of the oval.
- fillColor (string): the color that you want to draw the circle.
Your job: Currently, the drawOval function draws a hard-coded oval that is always the drawn at the same position with the same color and size. By using parameters, you will make your function more flexible so that it can draw an oval anywhere, with any size / color.
3. Modify the drawBullseye function
The job of the drawBullseye function is to draw a bullseye of 4 concentric circles to the canvas, centered at center. The largest concentric circle will have a diameter of size (value of the argument), and each additional concentric circle will be 25% of the size of it’s parent. For instance, if size=100, then the largest circle’s diameter will be 100, the next largest circle’s diameter will be 75, then 50, then 25. Please also alternate the colors between any two colors. Your drawBullseye function must accept the following arguments (currently, it accepts no arguments):
- centerX (number): the x-position of the oval.
- centerY (number): the y-position of the oval.
- size (int): the diameter of the largest circle in the bullseye.
HINT: you’ll have to draw the biggest circle first, or else your big circle will overwrite (occlude) the smaller circles.
4. Modify the drawFace function
The job of the drawFace function is to draw a face (i.e. a circle) with two eyes (i.e., ovals or circles) to the canvas, according to the center point and width specified by the arguments. The function accepts the following arguments (currently, it accepts no arguments):
- centerX (number): the x-position of the face.
- centerY (number): the y-position of the face.
- size (int): the size (diameter) of the face.
- Important: The eyes should scale with the width of the face. In other words, as the face get’s bigger, the eyeball size and position should scale proportionally with the size of the face.
- The mouth is extra credit.
Testing
When you’re done, your program should draw this image that looks similar to this one (feel free to use whatever colors you want for the bullseye):
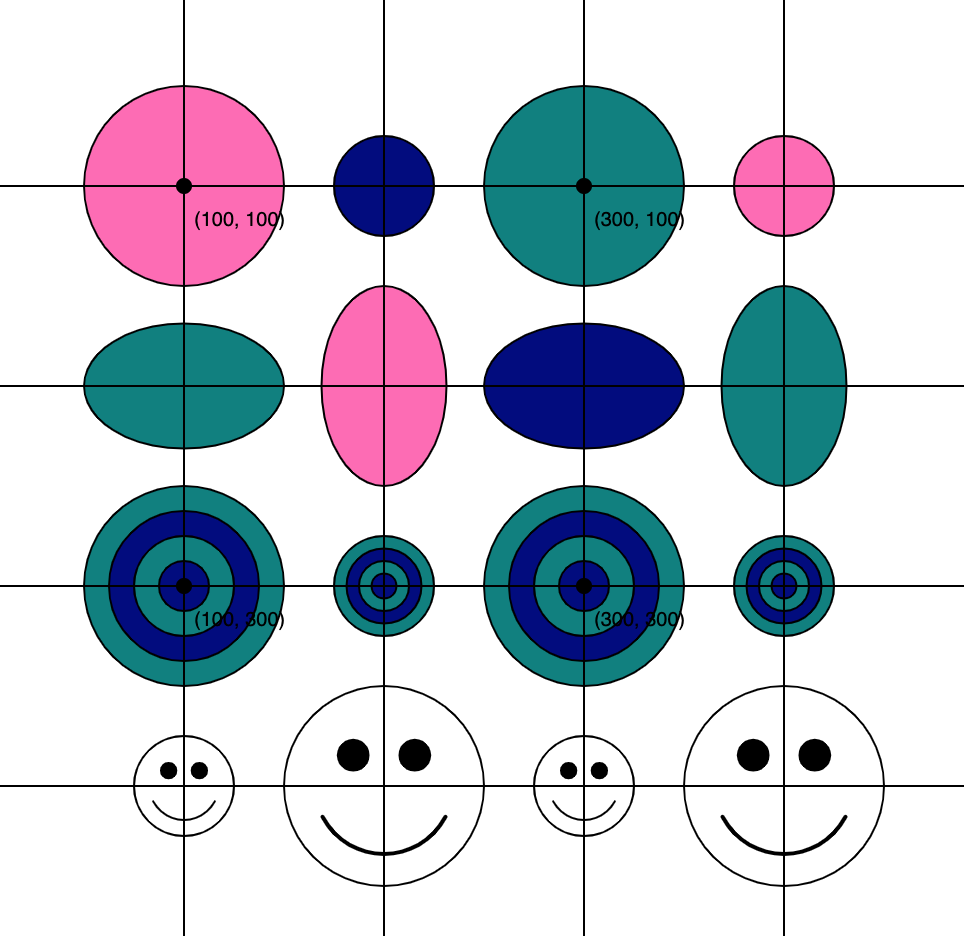
Here is how your function calls should look (from within the draw() function):
/*******************************
 HOW I WILL CALL YOUR FUNCTIONS
********************************/

// Exercise 1 (Circles):
drawCircle(100, 100, 200, 'hotpink');
drawCircle(200, 100, 100, 'navy');
drawCircle(300, 100, 200, 'teal');
drawCircle(400, 100, 100, 'hotpink');

// Exercise 2 (Ovals):
drawOval(100, 200, 200, 125, 'teal');
drawOval(200, 200, 125, 200, 'hotpink');
drawOval(300, 200, 200, 125, 'navy');
drawOval(400, 200, 125, 200, 'teal');

// Exercise 3 (Bull's Eyes):
drawBullseye(100, 300, 200);
drawBullseye(200, 300, 100);
drawBullseye(300, 300, 200);
drawBullseye(400, 300, 100);

// Exercise 4 (Faces):
drawFace(100, 400, 100);
drawFace(200, 400, 200);
drawFace(300, 400, 100);
drawFace(400, 400, 200);
3. What to Submit
Please Read Carefully: To submit Tutorial 7, please paste the following links into the Moodle under the Tutorial 7 submission section:
- A link to your homepage on GitHub pages, which should link to the drawing you made in tutorial 7 (tutorials/tutorial07/index.html). See Sarah’s Homepage for an example.
- Note that your homepage should also link to previous tutorials and homework you have done.
- A link to your GitHub code repository (where your code files are stored).