Assignments > Tutorial 4: Practice for Quiz 1
Due on Fri, 09/09 @ 11:59PM. 4 Points.
Introduction
This tutorial is a practice quiz, and is intended to help you prepare for the quiz next Wednesday. A few notes:
- You are strongly encouraged to start working on this tutorial before Friday, to get the most out of it.
- To get credit for this tutorial, you must successfully complete at least half of the exercises below.
- Please download the starter files and save them in your
csci185/tutorialsfolder:
Part 1: HTML & CSS
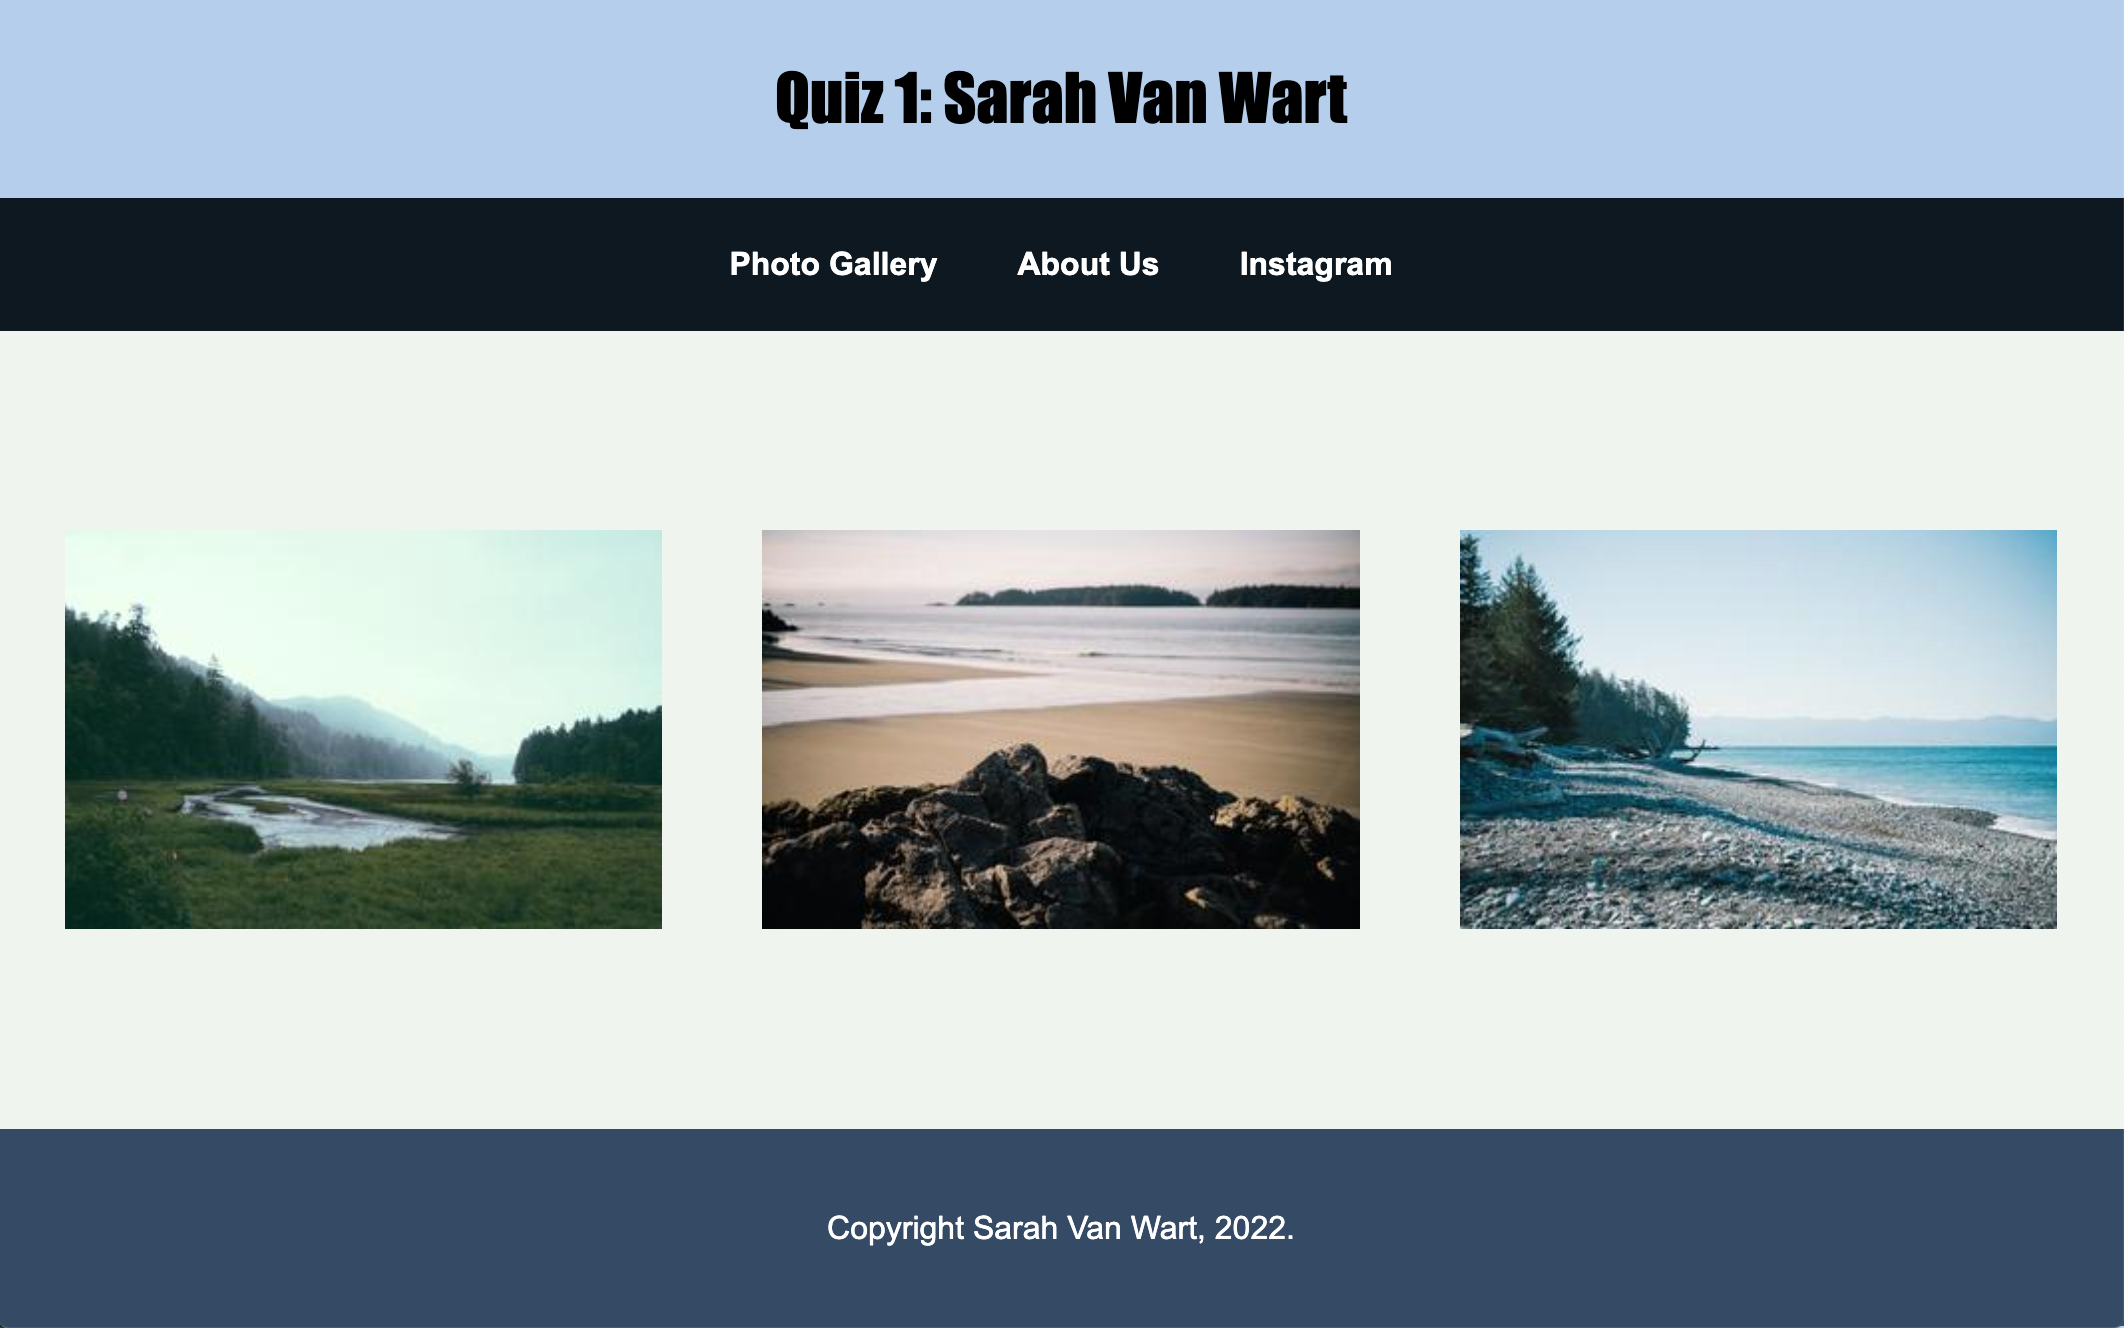
In Part 1, you are going to build the webpage pictured below:
To do this, please complete the following:
Download the tutorial04 folder. Inside of the tutorial04/part01 folder, create a brand new HTML file called index.html. Edit index.html file by adding an HTML “skeleton” with the following tags:
<!DOCTYPE html>
<html lang="en">
   <head>
   </head>
   <body>
   </body>
</html>
When you’re done, complete the following tasks:
1.1. Metadata
- Add a
titletag inside of theheadtag, with the display text of “Practice Quiz 1: Your Name.”
1.2. Header Section
- Add a
headertag inside thebodytag (don’t get the head and the header tag confused). - Inside the
headertag, create anh1tag that displays the text “Practice Quiz 1: Your Name.”
1.3. Navigation
- Below the
headertag, create a navigation section using thenavtag. - Inside of the
navtag, create three hyperlinks:- One that links to
gallery.html(in the pages folder) with the display text of “Photo Gallery”. Use a relative path. - One that links to
about.htmlwith the display text of “About Us”. Also use a relative path. - One that links to Instagram’s home page, the display text of “Instagram”. Use an absolute path.
- One that links to
Note: you may not move the gallery.html or about.html files outside of the pages folder.
1.4. Main Section
- Below the
navtag, create amaintag. - Inside the
maintag, create a section that has an id of “images”. - Inside of the section you just made, create 3
imgtags that display the three images in theimagesfolder, using relative paths.- Don’t forget to use the
altattribute to give each image a description (for people who use a screen reader).
- Don’t forget to use the
1.5. Footer
Create a footer section below your main section using the footer tag. Within the footer, create a paragraph tag that says “Copyright Your Name, 2022.”
1.6 Styling tasks
Create a CSS file called styles.css inside of the tutorial04/part01. Edit your index.html file and link it to your stylesheet. Then, complete the following tasks:
- Create a rule for the
bodyelement that sets the background color to a light gray (#F0F4EF). - Create some style rules for the
headerelement (and any relevant child elements) to:- Set the background color to
#b4cded - Center the text horizontally and vertically.
- Set the font family to
Impact.
- Set the background color to
- Create some style rules for the
navelement (and any relevant child elements) to:- Center-align the hyperlinks
- Turn the background color to black
- Set the link color to white, no underline, and bold (hint).
- Create some style rules to ensure that the three images are all in a row, evenly spaced, and with the same width. You may use any technique you want to do this, so long as you’re using CSS. See the screenshot above.
- Create some style rules to set the footer’s background color to
#344966, and the footer’s text color to white.
Part 2: CSS Grid
For Part 2 of the practice quiz, you are going to create the layout shown below by modifying the CSS file inside of the exercise02 folder. You should not need to modify the HTML file. Note that the gridlines are just for demonstration, but they won’t actually be visible.
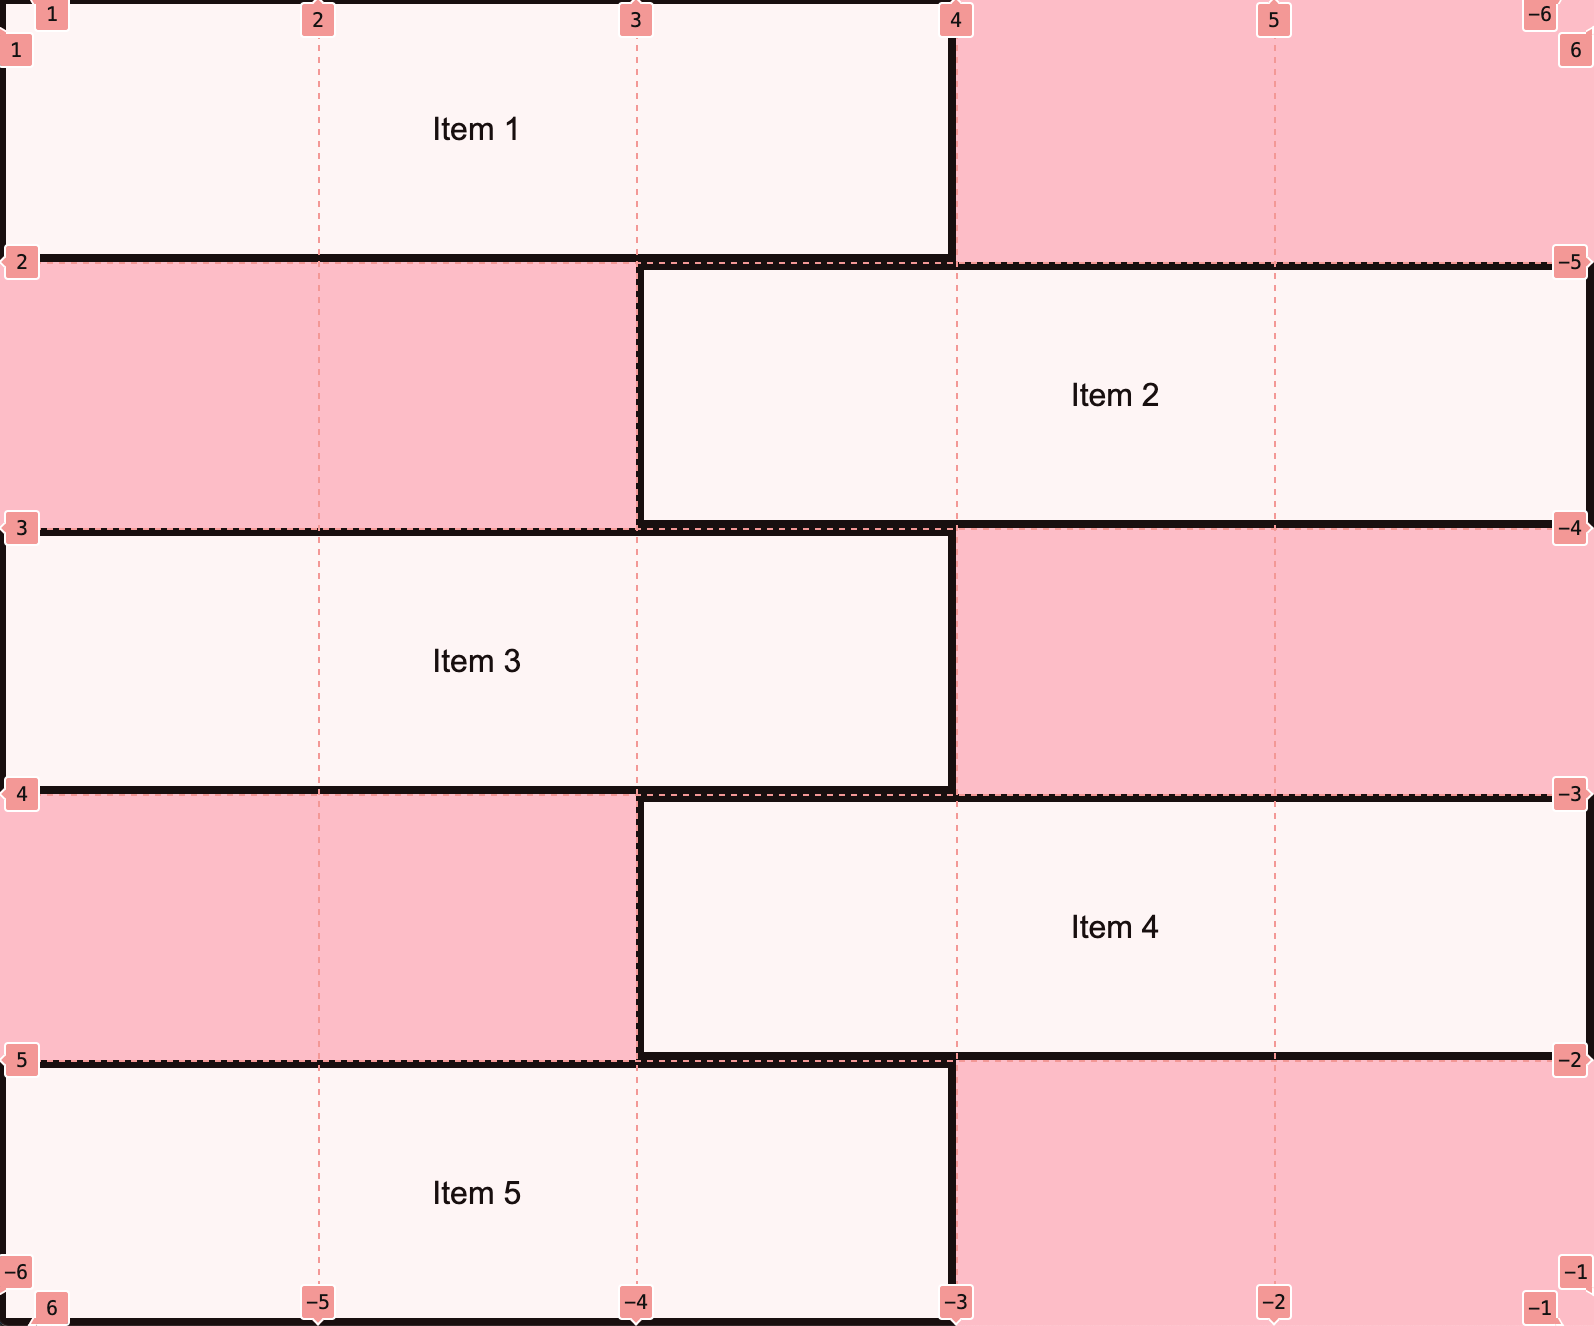
Specifically, you will:
- Ensure that each of the 5 sections span the grid as shown. For instance:
- Item 1 spans the first three columns and is positioned in the first row,
- Item 2 spans the last three columns and is positioned in the second row, and so forth.
- Note: You do NOT have to center the text inside of each section unless you want to.
Part 3: Flexbox
For Part 3 of the practice quiz, you are going to create the layout shown in the animated gif below by modifying the CSS file inside of the exercise03 folder. You should not need to modify the HTML file.

Specifically, you will:
- Ensure that each section is exactly the height of the browser height.
- Ensure that the content inside of each section tag is centered horizontally and vertically.
- Ensure that each section has a different background color.
What to Submit
Please commit and push your changes (like we’ve been doing in class for the past few weeks). Then, paste a link to your code repository (e.g., https://github.com/vanwars/csci185-coursework) to the course Moodle under Tutorial 4.
- If for whatever reason you can’t get your GitHub working, please zip your entire tutorial04 folder and submit it to Moodle under Tutorial 4.